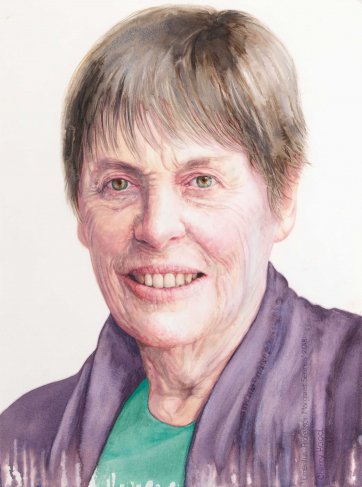
I love to use the measurements and the proportions and, you know, just little things like having an eye space between the two eyes is important and the nose is the width of the space between the two eyes. Just all these little simple tricks that are spelled out to my students in a live workshop. You don't have to have it, you know, fabulous skills. You can trace, you can use a projector, you can do all kinds of things to get your image.
Now I would start with flesh on one side of the painting. The photo is shaded just on one side as it is. Ah, if it wasn't, I'd make up the lighting. Because with watercolor you have only the opportunity of the dry, white paper for light. So I just leave one side. You've got enough to do with the other side and getting that sorted. We can get these really great little stiff brushes from Walmart because quite often these ones are now a bit too soft. This one works really well, too.
So we wanna have the effect of around this here. So we're going, we'll have dark flesh and then a pale flesh and then the light on that side. So definitely softening the edges of the paint with this nice stiff brush. You can see some nice marks coming up in this already. That's dried so because this brush is nice and stiff I can give it a little bit of a scrub there and dry it, soften the edge easily. You wanna do a good painting, so you wanna add interest on every level. You're not, you don't think, Oh, well, that's the undercoat so I'm not gonna worry about that. Every level is gonna show through with watercolor. So every thing you put on there is gotta count.
Okay, so I've just put some extra detail in with this nice mixture that I've got here, which is the same colors as the shadow color, but not as much water, obviously. Just very carefully. And notice how I'm holding the brush very softly and gently. And I've got a lot of scope when I hold it like this. I can, you know, really move my wrist around. And I'm gonna color in this whole area, but she's got light coming cross here. So I'm gonna leave plenty of light on the iris on the light side. So I've got options later to put the light where I want it to be. This one's come up nice, nice and dark. And I'm going to put this black shadow across the top here, too, 'cause the eyelashes went down there and then up there like that. If the brush is too wet, that's just gonna run everywhere. And if it's too dry, nothing happens.
So you'll learn over time with practice on this one. I can't give you a really good why if... Just practice and trying different things that you'll get that. So I've got that really-made, slightly dirty color for the top lip. You don't, you wanna, I don't know how to describe it. You wanna be proud of your painting. You wanna put as much effort into a good painting. Really wanna soften the edges of the lips. And they'll look, appears more natural if they're soft, even if the person's wearing lipstick. Now because the hair is behind there, I'm going, instead of coloring in between each of those stripes there, I'll just. I've got to try not to get too much onto the brush. Too much of the brown. Her hair is getting darker and darker. I like lots of water and it's such a great opportunity to go crazy, especially with long hair. That's waterproof on the back and fabric on this side. It's beautiful. So you can see the blonde streaks are coming back in there. That's better. So it's not gonna drip too much..
Thank you everybody. See you all again some time soon. Take care. Bye-bye.
